The selector is a resizeable window common to article databases and set databases. The set databases are described in Set Databases.
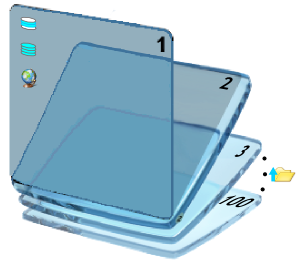
Each database is located in a local or distant directory. Such a directory is defined by a path which is identified with an Id number (1 thru 100). Its databases are quickly retrieved from QDV7 using an interactive directory. The whole collection of these directories serves as a meta-directory to bookmark databases:

To switch to another directory, use the drop-down list. To scroll the meta-directory, click the buttons that wrap the list (one increases the Id number, one decreases it).
To display the Id numbers in Minutes, add the Database path column.
For the Id number 1....61, the system Global Variables PathToDatabases_xx contain the absolute path.
In each directory all the set database names have a bold typeface.
The right drop-down list serves as a filter sorting the (databases of) articles and the (databases of) sets.

NOTES
- The version number is available for databases published by EuroID (refer to Prefixes); to delete obsolete databases, click Delete
- The Preferential (databases), Prefix and Sets editor tabs are attached to the current estimate.
To adjust the column's width, drag the header's border.
To sort the articles, select All Articles.
To filter the list by the name, enter a text in the Seek zone.
To order the rows according to the values of a column, click the column's header. It takes the mark >> (increasing order) or << (decreasing order). Alternative: Shift + → and Shift + ←.
To rename a database, select it in the directory and click the Rename button.
To delete a database, select it in the directory and click the Delete button. You can select the database version(s) to delete.
To create a database, select the directory which will host it, click the New button, and name the database; do not enter a database name that already exists in this directory. For an SQL database, refer to How to Access a QDV Database with SQL Server. To add rows, refer to How to Create/Edit Articles. To add columns, refer to How to Add Columns; this describes in particular how to transfer the column layout of an estimate minutes view into the new database.
To compress a database file, close it, click File>Tools>Compact an estimate or database, and select it. The file extension remains qdb.
NOTES
- Date and version can come from a database provider, such as EuroID; refer to Prefixes
- A base can also be built from an external workbook to QDV7; refer to Conversion of a Workbook into an Article Database and Conversion of a Workbook into a Set Database
- To create a Tarifeo database:
1.Select Data>Partner Applications>Tarifeo>Open database; this assigns the directory #100 to C:\Users\<user's name>\AppData\QDV\Tarifeo
2.Copy-paste to this directory the Tarifeo template located in <installation directory>\QDV7\Additional Software
3.Insert the desired columns.(Refer to How to Add Columns.)
PUBLIC_COST_UNIT (free field) = MATERIAL_CostPerUnit, SUPPLIER_REBATE (free field) = MATERIAL_Rebate
Direct access: Data>DataBases>Paths Manager.
To redefine an Id, select the Id in column #, click Local and select another directory. The databases in the old directory are not directly accessible any more.
To delete the link between an Id and a directory, select the Id and click Clear.
The path featured at the selector opening is the latest selected one.
To define a path to a folder that does not exist yet, enter it in the text area at bottom of the window; however, this does not create the folder.
You can use these shortcuts: <PROFILE_PATH>, <TEMP_PATH>, <DESKTOP_PATH>, <MY_DOCUMENTS_PATH>, <INSTALL_PATH> or <CUSTOM_PATH>.
<CUSTOM_PATH> refers to the path in the first line of the CustomPathVariable.inf file, which must be located either in the installation folder or in the C:\Users\Home\AppData\Roaming\QDV path.
The role of buttons Server and Web services, and Rebates is described in How to Deploy a relational database and How to Edit a Rebate Base.
To attach common preferential databases to :
4.Close any estimate
5.Click Data>Databases>Select Preferential Databases
6.In the Preferential tab, click Add and select a database; it adds to the list of databases attached to the user profile (icon with gray heart).
The order can be changed with ^and v buttons.
To attach preferential databases to the current estimate, refer to Preferential Databases).